Friday, December 2, 2016

A few more "miracles"--printing variants and one for the dumpster.


This copy is on Magnani incisioni and is my favorite.
I started with just one sheet of Echizen Kozo, a high-quality, pre-sized 100% kozo paper. I got 10 pieces of paper from the one sheet and I also printed several versions onto what was probably Magnani incisioni, an Italian, sized, etching paper.

With just a few sheets and working with multiple thin layers of color, there's a lot of variability to the final prints. I gradually went darker and darker, not sure that I liked them on the pale side, but then looking at the darker ones, I chose not to darken the early ones to make them uniform as I still wasn't convinced.  So in the series, they go from a paler dark blue sky, to a darker pale blue sky with more or less bokashi to the lower field.


The two prints on Magnani incisioni started to resist the color (there may have been a little oil in one of the pigments) and the one I pulled out early--a hazy, glowing light blue/purple/pink version at the top of the page--is my favorite of the lot.  The darker blue one at the bottom had to be blotted as the color sat on the surface and puddled and is a bit smeared--but not really ruined.
The only reject was this one;


I should know better but every now and then I get distracted.

Final tally:

Modern Miracles, (rain for Aleppo).
e.v. 10 and 1 A/P
image is 8" x 6"; paper size is 8"x10".

Tuesday, November 29, 2016

Modern Miracles-Rain for Aleppo


Aleppo, 2016. "Planes are more than birds, and bombs are more than rain," one resident said of the Syrian air force's renewed blitz. (CNN; 11/18/2016).


It is written that Fire and Brimstone fell from the sky and destroyed the cities of Sodom and Gomorrah.
But then it was a wrathful god laying waste to cities populated with only sinners and immoral men and women.  Now we live in a New Age and the men without morals, mercy or a shred of goodness are not to be wiped from the earth but are instead the ones sending the planes and dropping the bombs and the canisters of gas on the sleeping cities below. Today, we don't need holy books to tell us what is happening, as we can watch the bombs fall live on small flickering screens until we turn them off or simply scroll past the images of dead infants, and dust-covered, bloody children and crying men, mutilated soldiers and buildings that aren't buildings anymore. 


I watched the you tube video of cluster bombs falling at night in the Syrian village of Aleppo.
I thought they were strangely beautiful to look at, and they reminded me of the shooting stars my children and I had stayed up late to watch when the Perseid meteor shower occurred earlier this year.  But I knew these were bombs and not meteorites and the footage on the news that followed was horrifying and I was overcome by an incredible sense of shame and helplessness in the wake of image after image of the violence and death being showered on these poor, trapped residents in a city besieged in a modern war by forces with no qualms about the killing of  unarmed residents using chemical weapons or through indiscriminate bombing raids with weapons that will kill large number of civilians as well as their intended military targets. 


**Cluster bombs are weapons that can be ground fired or dropped from aircraft that contain multiple (from as few as 4 to 100's) of smaller explosive devices that spread to detonate over a large area. They are designed to kill multiple troops and to destroy and disable military vehicles but they are plagued by a high failure rate where large numbers of the small and sometimes toylike bomblets do not detonate. It is estimated that 40% of casualties from cluster weapons are civilians, and a large percentage of these are children--during attacks and often after hostilities have ceased. "Cluster munitions pose an immediate threat to civilians during conflict by randomly scattering submunitions or bomblets over a wide area. They continue to pose a threat post-conflict by leaving remnants, including submunitions that fail to explode upon impact becoming de facto landmines. The 2008 Convention on Cluster Munitions prohibits the use, production, transfer, and stockpiling of cluster munitions. It also requires destruction of stockpiles, clearance of areas contaminated by remnants, and victim assistance. More than 115 states have joined the Convention on Cluster Munitions and are working to implement its provisions. Human Rights Watch is a founding member of the Cluster Munition Coalition and contributes to its annual Cluster Munition Monitor report. " (Human Rights Watch).

***The cluster bombs falling on Aleppo are being dropped by both Syrian government and Russian forces (although they both deny it) but these images could easily have been of conflicts in Yemen, or Afghanistan, or Lebanon.
There is an international ban since 2008 on the use of Cluster bombs but countries that make them or have large stockpiles, or use them regularly in conflicts have not adhered to the international accord. While 118 countries have signed the agreement, the USA, Russia, Saudi Arabia, India, Israel, and many other countries are NOT signatories to the accord and continue to make and use these munitions during conflicts.

The last US manufacturer of Cluster weapons has only this year declared that they will stop manufacturing them in 2017 (but will honor existing orders and deliveries) citing among other things, falling demand.


Thursday, November 24, 2016

Blue


 I have a few more layers down, working off two background blocks. There's a very pale carmine bokashi background that went down first, then a pale yellow bokashi and now and then an ultramarine blue followed by another orange glaze.

Rain is expected so I'll be able to escape to the studio and I hope to finish this in the next day or so. 

Probably 2 more color passes to go.


Saturday, November 19, 2016

Miracles--Bokashi 2 of x?


The second color from the other day.
This block is pretty much retired. Now I'm going to be playing with the background using 2 blocks to selectively mask and enhance these shapes.
But most of what you see is going to disappear.

Wednesday, November 16, 2016

Miracles


While I have a couple of print ideas bouncing around my head,  I started this with no advance planning.  It started as a test block--I was testing the sharpness of the V-gouges I sharpened for class and the cheap, thin stock I was cutting--here they call it fromager (cheese?) wood and I haven't yet figured out what it would be called in English--cut cleanly with the just-sharpened tools. It's soft and has a prounounced grain but doesn't look like it will hold any detail.

From the test block came an idea, and I cut another block to match the first and a few test prints later I was at the printing bench. The two blocks are complementary--they're positive and negative but also coarse vs. elegant and they'll be working with and against each other as this print progresses.

 Here's the rough test of the cut block printed on bond paper--
and below, the same block, now cleaned up and printed in yellow, on good Japanese washi.

This is the first of many bokashi printings to come.
I printed a second color tonight but didn't have time for photos.

I set it all aside in the damp pack for a few days as I have more olives to pick (we're making olive oil) and until the rains start, I'm needed in the fields. But I'm hoping to start printing the second block in the next couple of days.

I'm still hopeful that this might come out and
happy as all get out to be printing on Echizen Kozo again.

A.


Sunday, November 6, 2016

Paper Trials and Tribulations

My favorites of this mosaic are the maybe "Hosho Select?" top row L; and the bottom R, Shin Hosho(from Intaglio Printmakers).


I have continued to try to locate a reliable source of sized, student-grade paper suitable for general work and student workshops.
My favorites for my own work, the reliable and consistent papers that always print beautifully for moku hanga are still Echizen kozo and Kizuki Hanga and Nishinouchi (from McClains in the US) and Mawata light and Kihada Light and Shin Hosho--all via Woodlike Matsumura in Japan or Intaglio Printmakers in the UK.  But these papers run from $20-45$/sheet and I'm always looking for a paper I can get in Italy that is suitable for general work.

So I was very pleased when the Awagami paper factory started to begin to market their art and printmaking papers in the West.  In a packet I received for my entry in a recent show, I received a selection of printmaking papers from Awagami.  I pulled out the ones that looked like they'd be workable for moku hanga--either by feel or from their descriptions.

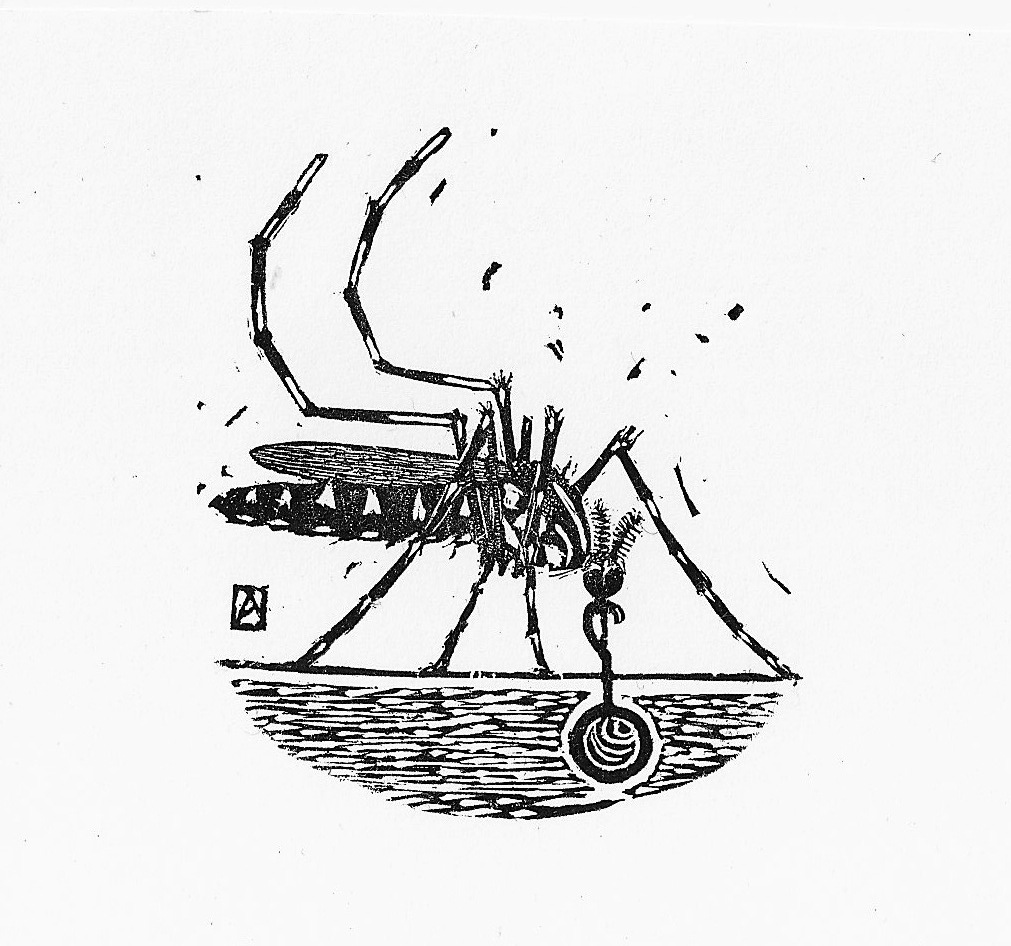
I also did a series of test prints, trying out this simple 4-block print to see how each would print and hold up to the several layers and colors.


The etagami drawing above was done by a 12-year old neighbor.  I cut it as a 4-block simple woodblock print with 2 bokashi layers and no background.

For comparison: here is the same print on two western papers;
Zerkall Smooth and Annigoni
Zerkall smooth


Annigoni a 100% cotton watercolor paper from Magnani


Based on these trials; I chose a couple papers for my recent workshop.
In addition to the double weight coated Bond paper that I use for proofing.
I cut up sheets of Zerkall Smooth, Magnani incisioni for European papers and based on the above tests the Hosho Select and Okawara Select from the Awagami line of editioning papers.

The latter papers are now available in Europe and I was pleased that these two midrange papers were both listed as suitable for water-based woodblocks on the Awagami site and confirmed in my trials.

Unfortunately, the paper that arrived was different in the hand than the papers I'd tested.
The Hosho select (top L above), while being listed as good for water-based woodblock prints is  is listed in the Awagami catalog as Unsized(that's not good) and a laid paper....just like the paper that arrived....but UNLIKE the paper I tested which acted like my old favorite and heavily sized Shin Hosho and had NO laid lines......
And when I went to dampen the paper I had carefully pre-cut for my students.....It clearly sucked up the water like blotter paper and was too soft to be workable.
The Okawara Select was the same as in my trials, but at the larger size I gave my students it too was  a little too soft, and since they didn't carve deeply or cleanly enough, most got spotting and ruined prints as the paper was a little too soft and floppy for beginners.

So, I'll have to look again at the others: the shiramine and bamboo papers didn't print badly and I'll try a few more before I decide what to try for my next class.


Thursday, October 6, 2016

Bloodlust


You'll have to make what you will of this little thing.
The words I repeat often, sottovoce, and are the closest thing to a mantra that comes out of my mouth, usually just before or sometimes after.
But I haven't succeeded.
and I haven't been able to achieve any sort of state of enlightenment.
Not yet.

I think of Kasturba
and wonder how she felt about the Mahatma's vow of chastity.
Was she tired of it all, and relieved to be done with all that.
Or was she angry and resentful, despite the higher calling and important things in the world that needed doing outside.

But then I think of Bukowski, who couldn't be bothered with any of that,
and a bug on the wall while he's sitting on the pot writing poetry.
And we know how that ends.

"Desire", 3'x6" original wood engraving with hand set type and egg tempera.

Monday, September 26, 2016

All abuzz......

I'm participating in the Baren Forum's 70th Print exchange which has no theme but does specify a paper size (3" x 6") as well as a technique "challenge" requesting works done in the spirit of wood engraving.  The due date for finished prints is November 1st and oddly enough (for me),

I'm well on my way.
I've engraved most of the block and I'm now refining the image after taking some rough proofs.
I wasn't happy with the 1st printing--I think my ink was too thick or stiff and my paper a little too rough.
There's a lot of detail cut on the block that's not showing up on the paper and I wasn't sure whether to keep the background.
I cut out the black background with a pair of scissors and decided that I like it better. So I went back to the block with the scorpers to clear it.
Another of the first proofs, trimmed to show what it might look like without the black halo.


I've cleared out most of the background and added a tiny chop to the corner and taken another proof:
Mosquito Proof #2 (on coated bond paper)

Better.  I'm still not happy with the clarity of the legs and torso. But it's pretty close. I've a little tidying up to do with the background and try to make the legs and torso a little more readable.
I still need to set some type for the title and I have an order for paper from Intaglio print makers on the way.  So I'm on hold until the paper arrives.

There are 22 people in the exchange so I need to plan on at least 25-30 copies to have enough for all the participants and still allow for bad copies or printing flubs...and once I see how easily or hard the block is to hand print, I'll decide on the total number of copies and whether there will be both a letterpress text and no-text versions. In the meanwhile there are still some corrections to make and I need to smooth the bottom of the block to allow for trouble-free (or simpler) printing.

Friday, September 23, 2016

Making mine smaller


Here's the reground tip with the piece I broke off.

The shortened tool, ready to go to work.
As I learned from David Sander's book on engraving, and as I've heard from a couple of full-time engravers, the tools I got from Lyons (via McClain's) as well many of the tools that came from my recent  Ebay purchase are too long.
For proper engraving the "mushroom" handle fits in the palm of the hand (and is the driving force) and the point of the tool should be at or just beyond the ball of the thumb for control and leverage.
Many tools were sold much too long and had to be shortened.  That was left to the engraver, but usually the tool would be put in a vise, and a sharp rap with a hammer would break off the tip, and a new point had to be sharpened (or the shank end was reground to fit in the handle).

It's hard to get up the courage to break off 1/3 of the working edge of the tool you just bought.
It feels wasteful and I wasn't sure I was up to proper sharpening.
BUT, I want tools I can use, and several of these; a couple of angle tints and scorpers are missing from my tool kit and needed on the block I'm currently carving.

So I've been doing 1-2 at a time, snapping them off, and then grinding them down with water stones to 30-40degree bevels and taking the time to get them really sharp.

I'm cutting the legs of a mosquito, so I need very sharp tools that I can control (and decent magnification).
More soon. 

Wednesday, September 14, 2016

Mosquito paralysis


My first clumsy engravings were really carved almost without thinking.  I didn't really consider what I was doing. I had a block, and a couple of tools so I just cut them and printed the resulting image without giving any thought to how I was working or the still unknown ways of working in wood engraving.

After finishing my last simple Puppet engraving, I finally picked up a copy of Simon Brett's book,"Wood Engraving How to do it",  that I had purchased some time ago.   I must admit that going through it has sort of stopped me in my tracks.
There is a great deal of useful information and illustrations: this section on how to make a "sampler" of the tools and the different ways to consider letters is really helpful.
Illustration from Brett's book on engraving showing lettering styles.
But further on,  he discusses and illustrates the varying ways one can approach an image and this other series, illustrated to show multiple examples of the same image, engraved in differing ways has stopped me completely.  There are just too many choices--

Illustrations from S. Brett's Book on Engraving.

There are more examples--many more as this image gets resolved in many different ways and styles.
Many aren't suited to my work or habit but in theory, I should be pulling from these as needed when solving issues of tone and depth require differing techniques.

So I'm back to the block thinking: now what?
I've done enough trials on scrap wood that I'd like to try a piece of real boxwood and see what the smoother cutting and fine grain will allow.  I have a small off-cut of European Boxwood that I've been saving for a small work and I have an on-again, off-again series of parasites and small insects that I wanted to add to and I have many small mosquito thumbnails that I've drawn over the last weeks and from which I managed to cobble together an image I'm happy with.
The above photo shows my prepared drawing applied to the surface of my block. The block is just 2.5" in diameter so the image is pretty small.  So now I'm ready to go but I've been hesitating. Thinking for example of how to resolve the "tiger" aspect of the alternating black and white bands of the insect legs.
 And in this case, my small frail insect on a round of box can be resolved in lots of ways.....most of which I had never even considered until now.  The biggest decisions--whether to carve the insect as a white drawing lifted out of the black ground or to engrave around my drawing--preserving the drawing itself by cutting everything else away which is a bit more natural for me coming from my moku hanga experience.

The good news however is that while I've been procrastinating, mulling over in my mind what I think I'd like to do, I've been sharpening my tools. Slowly I've been selecting the gravers I'm likely to use, and they've been cleaned and sharpened and honed and then honed again and so are actually ready to cut.


Meanwhile, as I stare at the block, I have to keep the fan on as the mosquitoes are honing in on my exhaled CO2 and my bare ankles and calves under the table while I sit, inactive, thinking about the first cut.

Sunday, August 28, 2016

Pnuppet.....


Letterpress 1: Andrew 0
Three words, 13 Letters, 2 spaces. What could possibly go wrong?
You can't imagine how many times I set up and then broke down the chase with my simple title.
Sure it  has to be upside down, and backwards and so I made it so. And yet somehow it was the wrong upside down, or the wrong backwards. I got the words backwards, but not the word order, or they were backwards but not upside down.....The chase will only go into the press one way, and I set the type wrong several times because I didn't take that into consideration. And in the final setup I missed the obvious (clearly visible if I hadn't already redone it 4-5 times....). I probably had it right a few of those times.....and then last night, when I was pretty sure I had it finally right:
Pnuppet.
I don't think that's a word.
Not even for scrabble.
But I'm not easily, or at least permanently, discouraged.
Today, with a fresh start, I sort of got it together......but not without a few hiccups.


But at last, I think I started using the tool closer to the way it's meant to be used.....

And so it begins.


Sunday, August 21, 2016

WoodLust: Part 2

Things happen sometimes seemingly by chance.

It was actually a fair amount of work to get the stumps to this point.


During a brief visit  to California about 4 years ago, I noticed, almost too late, that a neighbor was ripping out a boxwood hedge.  I drove by, then went around the block, parked the car and asked if I could have a few of the stumps...and as they were all destined for the landfill, they said, "less for us to haul away".  So I ran home, grabbed a wheelbarrow and threw 4-5 of the best-looking ones in the barrow and hurried home. As I was leaving for Italy the next day I just threw them under cover in the garage.

I knew boxwood was ideal for really fine detail in the Japanese woodblock prints I was making and I also knew that it was the traditional wood used in end-grain woodblock illustrations from about 1500 until the early 1900's.

And that's how I started engraving.
One of the first rounds off the stump, cut and polished by hand.

"Cardinal Climber", 2014. My very first wood engraving carved from the block above.
Encouraged by my first attempt and with the stumps still slowly seasoning,  I started reading about engraving, looking at the works of engravers and illustrators, and once back in Italy, I tried engraving small pieces of a few of the woods I had available locally; olive branches and the odd round of pear or apple from the pruning we do several times a year.   Jump ahead to this year,  and now after completing a few more engravings,  I decided that the wood was probably seasoned enough to try cutting.  Since my "test" blocks have always been hand-cut, the two surfaces were never perfectly parallel, and needed to be printed by hand with a baren or a spoon. But since I'm thinking of adding text and printing with a letterpress machine.....I needed to find someone with the right tools.


Fortunately I found a local furniture maker and craftsman who was able to cut down two of the better log/stumps into flat rounds. I had him cut them 240mm high, just a tad higher than French/German lead type.........as sanding and polishing should fix that.


So now I have a few years' worth of boxwood and it's time to get to work.


Saturday, August 13, 2016

The Puppet King

I  uncovered the pizza oven a few weeks ago and I noticed a strange log underneath that I didn't remember throwing under the tarp when I closed up the oven last summer. But it's been there, protected and drying for at least a year, and as I pulled it out I was struck by how heavy it felt....It clearly wasn't oak or madrone or a fruitwood, but it wasn't any of the exotics I cut down either--the tea tree or bottle brush or laurel that got heavily pruned last summer.
So I got a saw and cut off the stump end and then a round. And out of curiosity I started to sand it. 100-120-180-220-300-400-600-1200 and 1500 grits and about an hour or two later, I had a glass-smooth round of wood about 4" in diameter. The fact that it would polish to such a smooth finish suggested it might engrave well and so I went through a few sketchbooks and pulled out an idea I'd been thinking about since last year. I transferred the drawing to the block and started cutting.

This wood proved to be not suited to engraving after all and in my hands the end result is crude and rough.  The wood cut cleanly enough for simple lines but clearing or re-cutting tore and shredded the wood and real detail was impossible so I'm glad I purposely chose a simple, childlike image to engrave.

 My mask-like face turned into a puppet as I was carving and last-year's doodle became unexpectedly topical with the election circus going on in the news and the no-longer-hidden way that big business, oil and the pharmaceutical and agribusiness giants (and now the Russian government) seem to be controlling the people we elect to represent and protect the people.   I added the sets of eyes the background and the "King Puppet" became "The Puppet King".

"The Puppet King", wood engraving. 
I'm happy with how this came out. It's been almost a year since my last engraving and I needed the practice. Plus after meeting with a local engraver and making a few new acquisitions that I'll reveal shortly,  I'm really excited about my next one-- and this time on REAL wood and proper tools.

Sunday, July 3, 2016

Summer Smile


Summer Smile, moku hanga-watercolor woodblock print. 5"x7" 2016.
July.
It's here already.
Summer.
There is so much that I meant to do before it got hot. And so much to do before I leave again.
I can't even begin to make a list.
But it's already too hot.
I sit in front of a table fan and wait for the sweat to evaporate and my head to clear.
Maybe some ice tea.
Or a slice of melon.


Thursday, June 9, 2016

A Day Late. A shell pea saga and metaphor for life.


A day late.....
As they used to say in New England. "old peas are bad business".
The harvest window for fresh shell peas is very short. Too soon and they're really tiny (but very sweet). Later, as the peas start to fill the pod, the pod is still shiny and green and the peas are tender and sugary. Too old and they get hard and starchy. There's a brief period (1-2 days) when they're perfect. Plump but not crowded and still round(ish) and tender and sweet and full of the flavor that is totally "Spring". But if you procrastinate even 1 day to pick them you can taste the difference. More than that and there's the internal debate as to whether you should pick them at all.  It's a dilemma for the farmer as the yield when they're small is really, really low, but if you wait just a couple more days, they're big and fat and (when you sell by the pound) almost profitable (but much less tasty).  But here they sell for 6-7€/kg (about $3.50/lb.) and if they're picked when they're small, you need a really long row have enough to harvest. Add to that the fact that peas needed to be sold the day they are picked or the sugars in the pea turn to starch--in the same way that the old-time corn varieties need to be cooked and eaten right away and it's the rare farmer than makes a profit selling shell peas.     These are Progress No. 9 Dwarf Shell peas. Planted in early Spring (rather than the Fall as is the usual custom here) AND Picked a few days AFTER that fleeting, perfect moment.


Many market growers now grow only Sugar Snap or similar Snap Peas.
They stay sweet longer and as the whole pea is edible it's a much better deal for the farmer and the consumer. (easier to pick, much longer harvest window and better value to both). 
The really hard ones, already a pale yellow and corrugated I left in the field.

Since I grew these we eat them. Cooked with some fresh garlic, some salt, and a pinch of sugar (to make up for what isn't in the peas any longer) they were still pretty decent.  Or braised with the last baby artichokes, a little wild fennel frond, some lettuce leaves and a few stray asparagus spears and they still vanish from the table in a flash, even if they're not so pretty.

P.S.S. This is why frozen, baby peas are probably a good value.  They're picked all at once by a combine and immediately blanched and frozen and at the scale they're grown commercially, much less costly to buy for a product that is usually of high quality (baby peas) and better than you can find  in the market unless you have a farmer that's better organized and attentive than I am.
 

Wednesday, May 25, 2016

Oats


It's fast becoming Summer and the grass is growing faster than I can even think about cutting it.
In the fields are witchgrass, rye, wheat, and many others but the showiest in mid-May are the individual plants or stands or fields of oats (avena sativa).

 I've enjoyed listening to the birds and watching the young immature flowers/seeds swing and dangle in the breeze--akin to watching the flickering of a fire or the lapping of the waves. Rhythmic and predictable; so barely but infinitely variable.

I've been cutting them and bringing them in and I have carafes and jam jars, water glasses and vases full of stems and stalks.
Green dangling jewels like earrings or bangles or dry, spiny, bearded, spring-loaded seed heads or the flags they leave behind--"we're off, we're off" for the wind to rustle.
 Here are a few oat-inspired etagami.
The Japanese reads, "they invented dance"--my way of acknowledging the seeming joyful swaying and and almost synchronous ballet of fields of little green ballerinas.
Above, instead is a drypoint print--the sprig of green, immature oats drawn and then incised with a sharp point onto a flattened, recycled, Tetrapak container, and printed with a small press.